Select the mailbox(es) that you wish to backup from the list displayed.
Specify the temporary local backup path and click 'Schedule Now'.
Note:
(a) Ensure that the selected temporary location on your computer has sufficient free space to hold the contents of the individual mailboxes. You cannot select a temporary location on the remote location.
(b) Once local backup is initiated, '.ServerBackup' folder is auto created.
The 'Schedule backup' screen appears, from where you can schedule the backup for any future day and time or perform an immediate backup of the selected mailboxes.
What are the system requirements to perform Office 365 exchange mailbox backup?
Below are the system requirements to perform Office 365 exchange mailbox backup:
Windows 7 Service Pack 1, Windows 8, Windows 8.1, Windows Server 2008 R2, Windows Server 2008, Windows 10, Windows Server 2012 R2, Windows Server 2012, Windows Server 2016
2 GB RAM
Sufficient hard disk space to store the mailbox backup files (.ofl) for temporary backup and restore
Does IDrive support incremental backup of Office 365 exchange mailbox?
Yes, IDrive supports incremental backup of Office 365 exchange mailbox.
How do I perform Office 365 exchange mailbox restore?
To perform Office 365 exchange mailbox restore,
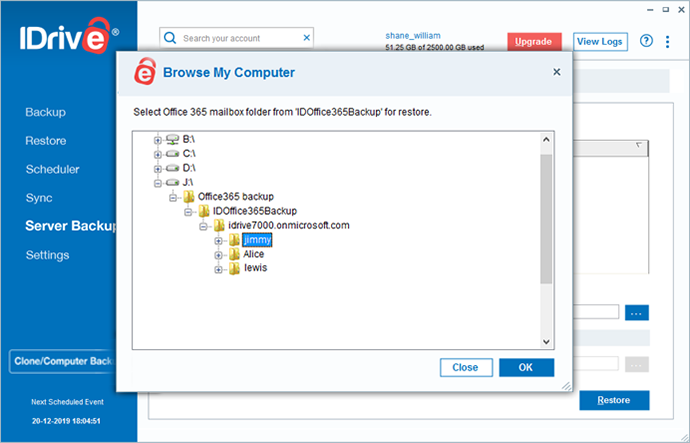
Login to the IDrive application and click the 'Server Backup' tab.
Select mailbox from the list displayed and browse the backed up mailbox from 'IDOffice365backup' folder.
Click 'Restore' to restore your backup data to online exchange mailbox.
You can also restore the backed data locally. Select 'Restore to local location', browse the path to restore locally and click 'Restore'. Data will be restored in eml, vcf, ics format with folder structure intact.
How do I assign impersonation rights for global administrator?
You can assign impersonation rights from Windows Powershell as well as Office 365 Exchange Admin.
What do I have to do to assign impersonation rights from Windows Powershell?
To assign impersonation rights from windows powershell,
Open Powershell in Administrator privilege mode.
Change the execution policy to remote-signed by executing the following command: C:\Windows\system32 > Set-ExecutionPolicy RemoteSigned
Connect to exchange online server by executing the following command: C:\Windows\system32>$O365Cred = Get-Credential
Note: Assign global administrator login credentials to a variable, so that the credentials can be included in the connection command.
Create a PSSession to office 365 by executing the following command: C:\Windows\system32> $Session = New-PSSession -ConfigurationName
Execute the below commands to import PSSession: C:\Windows\system32> Import-PSSession $Session
C:\Windows\system32> Enable-OrganizationCustomization
Assign the exchange impersonation rights to global administrator, in the following format:
New-ManagementRoleAssignment –Name:
<RoleName>
–Role:ApplicationImpersonation –User:
<Global administatroe> For Example: C:\Windows\system32> New-ManagementRoleAssignment –Name:backupimpersonation –Role:ApplicationImpersonation –User: admin@domain.com"
Assign the discovery management rights in the following format:
Add-RoleGroupMember -Identity "Discovery Management" -Member "Shane@domain.com"


 and go to 'Admin'. On the left navigation bar, click 'Admin centers'.
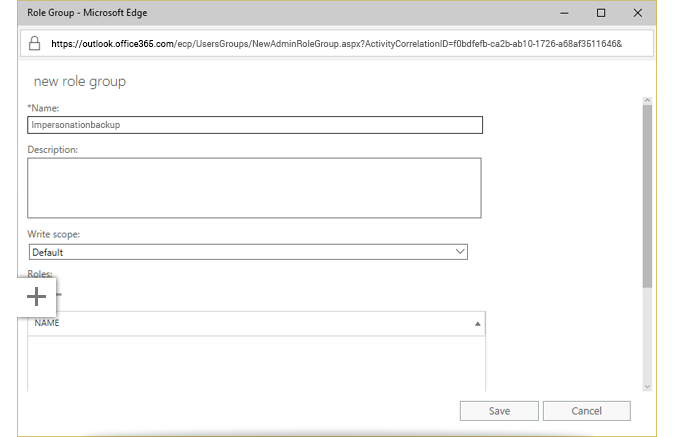
 to add a new role. In the 'new role group' window, enter the name as 'Impersonationbackup'.