Can I use my IDrive account to backup data from both Windows and Macintosh computers?
Yes, IDrive accounts created after 11-23-2011 offer cross-platform compatibility enabling you to backup and sync data from both Windows and Macintosh computers.
However, IDrive accounts created prior to 11-23-2011 are not cross-platform compatible, as these accounts work on different technologies.
Perform the following steps to install the application:
Download the application. Double-click IDrive.dmg and then IDrive.pkg. The 'Welcome to the IDrive Installer' screen is displayed.
Click 'Continue' to proceed with the installation. The 'Software License Agreement' screen appears. Click 'Agree' to proceed.
Select the location where you want to install the application, using 'Change Installation Location' and click 'Install'.
A screen is displayed for verification. Enter the valid system password (administrator password) and click 'OK'. On successful installation, the 'Installation Succeeded' message is displayed.
When I sign in to my IDrive account for the first time on a machine, I notice that some data has already been scheduled for backup. Why?
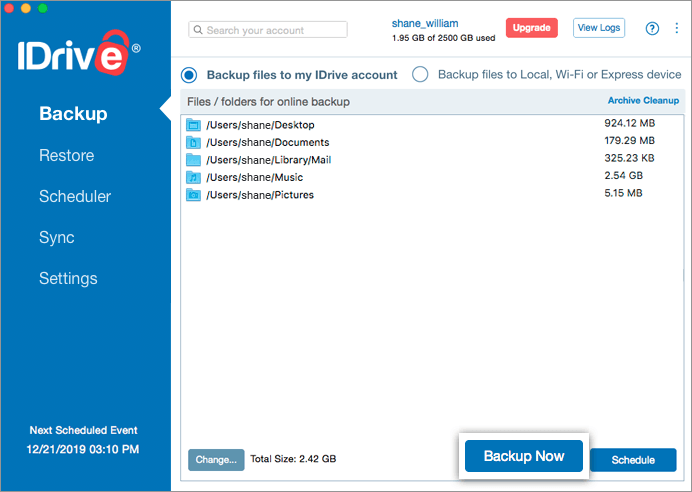
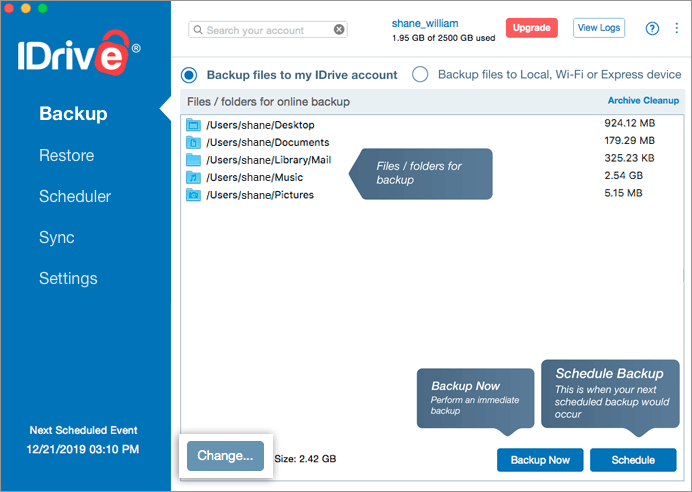
IDrive is an automated online backup application. To safeguard your critical data, the Desktop, Downloads, Documents, Library, Music, Movies and Pictures folders are selected for backup by default, with the scheduled time set to off-peak hours. If these settings are not altered, the application commences the backup of the default Backup set once the scheduled backup time is reached. However, you can change the settings.
On a first sign in to your account, a screen is displayed as below from where you can edit the contents of the backup set by clicking on the 'Change…' button, and schedule parameters.
If I perform frequent backups, would I end up using my quota quickly?
IDrive deploys an intelligent incremental backup system where changes to contents of the Backup set are sent to the IDrive servers. If data is removed / deleted / reduced, the space used in the
account reduces. The latest file copy is used to compute your quota. The previous versions of files are stored free.
I have deleted some unwanted files / folders from my IDrive account, yet the 'Total storage space used' remains unchanged. Why?
The 'Total storage space used' information is not displayed in real-time, but computed on a periodical basis. For updated information, click on . For accounts with a large number of files the process may take a while.
IDrive uses 256 - bit AES encryption for data transfer and storage with a user defined key that is not stored anywhere on our servers. This ensures data is safe and secure.
By default, the IDrive application transfers only the modified portions of your backed up files after full initial backup. This optimizes your bandwidth usage and ensures that backups are quick.
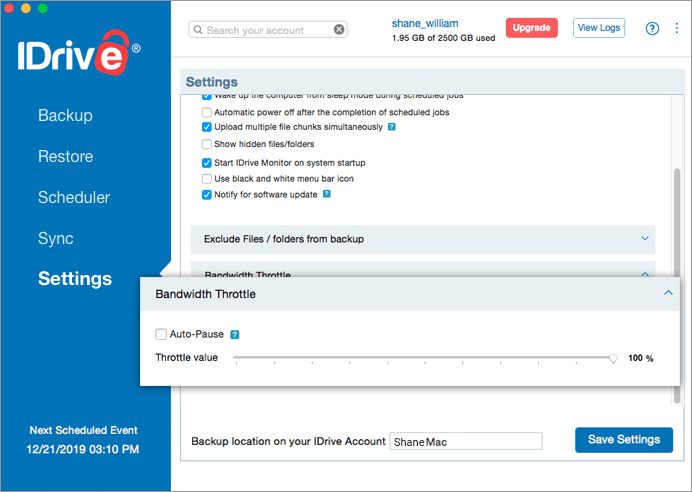
How can I regulate my Internet bandwidth usage for IDrive?
The Bandwidth Throttle lets you set the Internet bandwidth to be used by the IDrive application for backups. By default, the bandwidth throttle value is set to 100%.
You can enable 'Auto Pause' option, which makes intelligent guesses on bandwidth throttle during backup operation to enable optimum desktop experience with the following options:
Mac in use: This option lets you set the bandwidth to be used by IDrive for backups, when it is in use. By default, it is set to 25%. This allows other applications to run without hindrance.
Mac not in use: This option lets you set the bandwidth to be used by IDrive for backups when it is not in use. By default, it is set to 100%.
Note: The percentage set for Bandwidth Throttle is applicable for both scheduled and interactive backups.
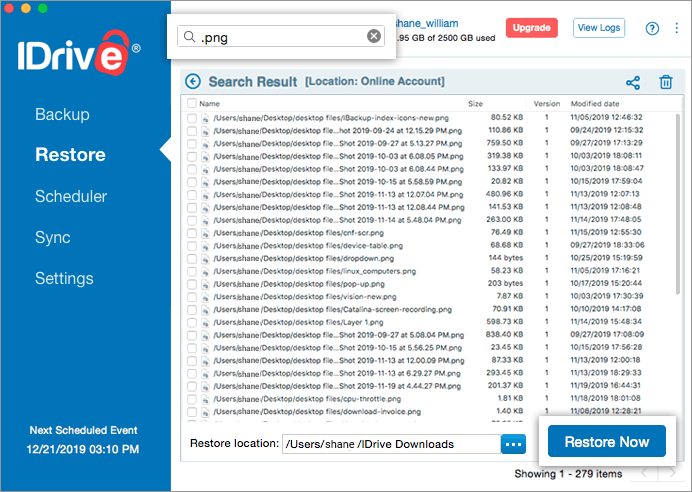
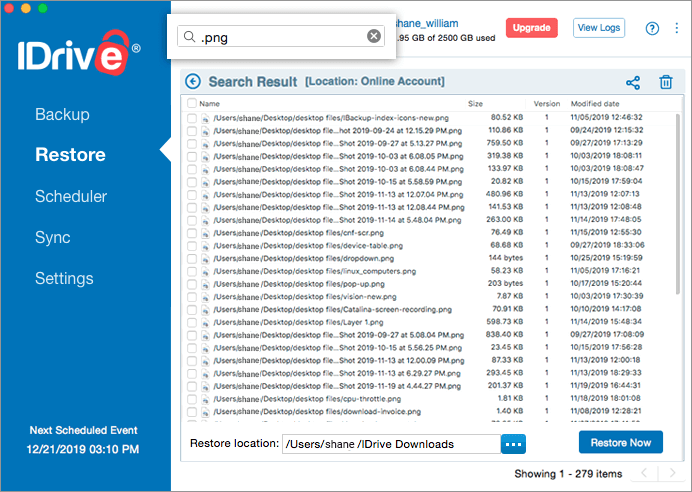
How do I locate files / folders in my IDrive account?
To locate files / folders backed up to your IDrive account, enter the search term (full or partial file / folder name) on the 'Restore' tab and press the 'Enter' key. Entries matching the search criteria are displayed and can be restored.
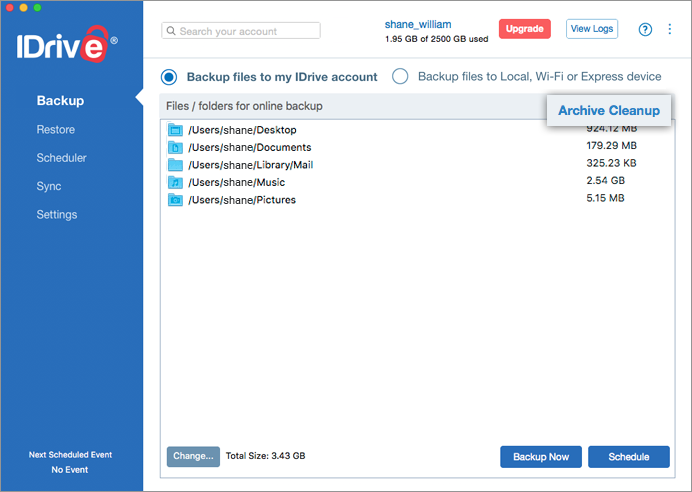
What is the Archive Cleanup feature and how does it work?
The Archive Cleanup feature lets you match the contents in your IDrive account with the data in the current backup set on your Mac. This is a useful option if you have removed data from your computer and wish to do the same automatically from your IDrive account.
To use this feature,
Click on 'Archive Cleanup' > 'Cleanup Now' button under 'Backup' tab.
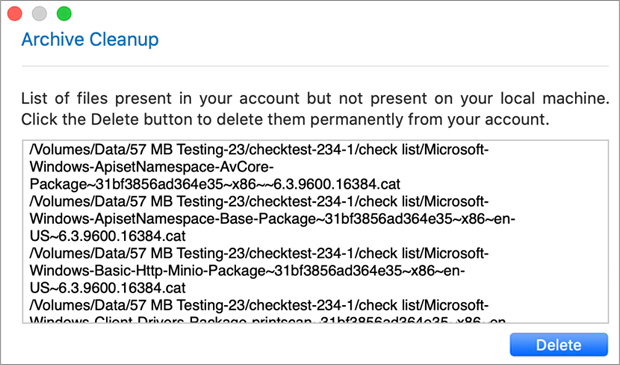
IDrive will generate a list of items to be deleted from your account.
Click 'Delete' to delete them permanently from your account.
Note: Archive Cleanup is not supported for USB and network mounted drives.
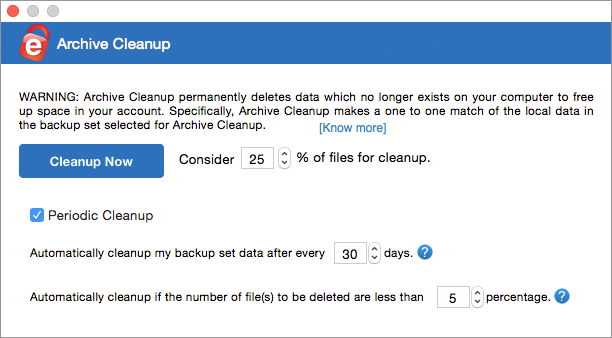
Periodic Cleanup feature matches files between your Mac and IDrive account with a lag of 30-days (applicable only for scheduled backups). In other words, if data is removed from your Mac that was previously backed up, the corresponding data in your online account is deleted after 30-days. This is useful in keeping your account size at optimal. The percentage mention refers to files considered for deletion in your account as a percentage of total number of files. The purpose of this percentage based control is to avoid large deletion of files in your account due to some unforeseen event on your Mac.
To access this option, click 'Archive Cleanup' button under 'Backup' tab and select the 'Periodic Cleanup' checkbox.
Note:
This may result in automatic deletion of data from your IDrive account. Set this option carefully.
Periodic Cleanup is not supported for USB and network mounted drives.
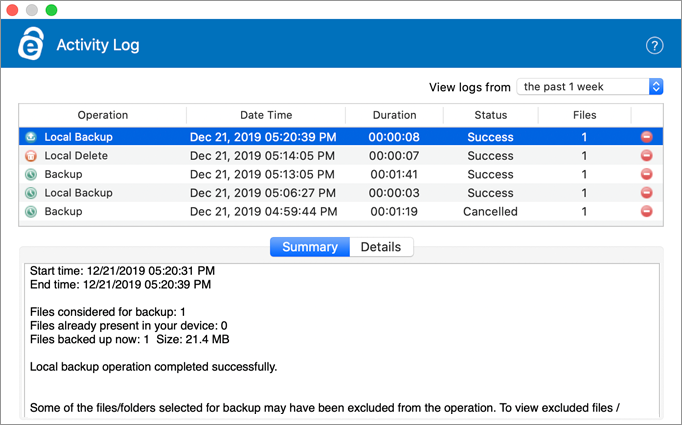
IDrive maintains detailed logs of operations like backup, restore, sync, delete, etc. performed in your account.
To view the activity logs, click on 'View Logs' displayed on the top-right corner.
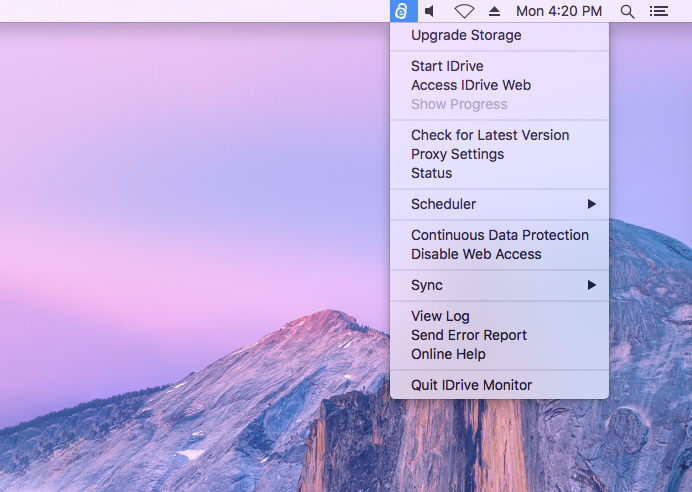
Alternatively, you can right-click on the IDrive status item and select the 'View Log' option.
Note: To delete logs and log category details, click against the specific log and click 'Yes' in the confirmation window.
Uninstalling IDrive from your Mac leaves your data vulnerable to digital accidents. To uninstall IDrive,
1. Go to File > New Finder Window > Applications > IDrive.app.
2. Right-click IDrive.app > Show Package Contents.
3. Navigate to Content > MacOS and double-click IDriveUninstaller.
4. You will be prompted to confirm the uninstallation process. Click 'Uninstall' to proceed with uninstallation.
5. Enter the valid system password (administrator password) and click 'OK'.
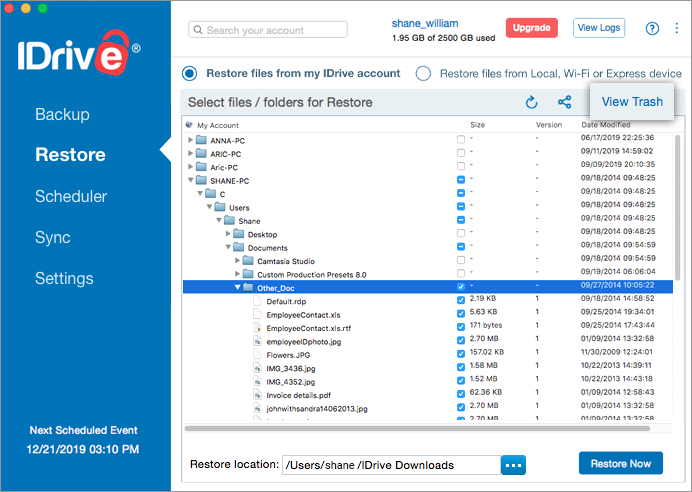
Is it possible to restore the files that are accidentally deleted from my IDrive account?
All the files that are deleted from your account will be moved to Trash. You can either move your files to the original location in your IDrive account or restore them to your local computer. The files present in Trash will automatically get deleted after a 30 day period.
To restore/move your files from Trash, follow these steps:
Click 'Trash' in the 'Restore' tab.
Select the check box to restore/move the desired files.
Click to move the files to the original location in your IDrive account. Or click 'Restore Now' to restore your files to the desired location in your local computer.
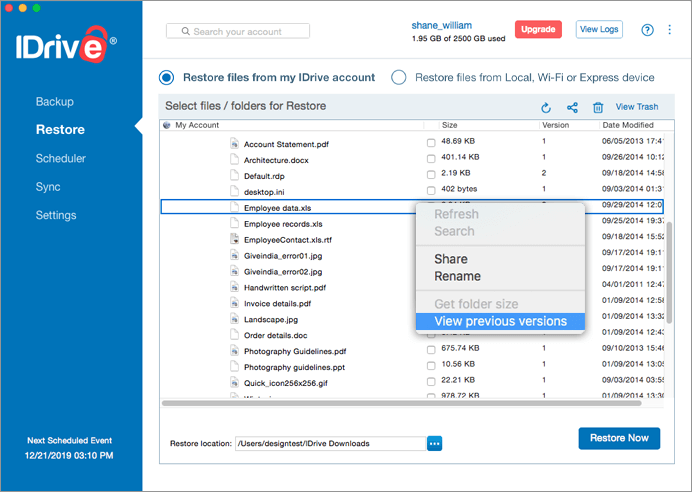
Can I restore the previous version of a file from Trash? *
Yes, you can restore the previous version of a file from trash. Right-click on the desired file and select the 'View previous versions' option. Select the required version and click 'Restore Now'.
I have backed up certain folders (containing multimedia, etc.) which are not going to change. Can I remove them from my Backup set, presuming that the backed up data wouldn't be affected?
After you have backed up files that you will not update, you
can remove them from your backup set. All files, once backed up, remains unaffected
in your IDrive account even if you remove their reference from your backup
set.
I have included files from a CD and DVD in my backup set. After I back them up, can I run subsequent backups without inserting the CD and DVD while my backup set still refers it?
Yes. The absence of the CD/DVD, referenced in your backup set, will not hinder your regular backup activity. However, files from CD/DVD shall not be backed up.
Can I change the color of the IDrive status item on the menu bar?
Yes, you can change the color of the IDrive status item to black and white. To change the color, from the 'Settings' tab, select the 'Use black and white menu bar icon' check box.
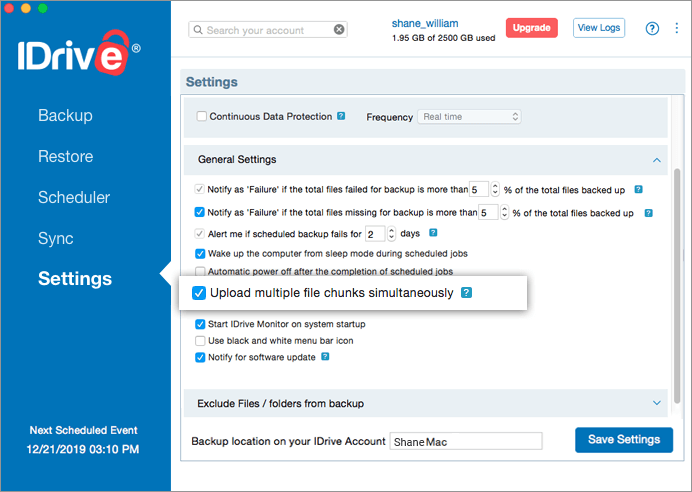
I see 'Upload multiple file chunks simultaneously' option selected by default under the Settings tab. Why is that?
The 'Upload multiple file chunks simultaneously' option will improve the data transfer speed during backups. This option is selected by default for user convenience. For optimum speed, ensure the internet bandwidth is high during data backups.
Do I need to pre-authorize IDrive in Mac OS Mojave and later, to provide access to privacy sensitive data?
Yes, Mac OS Mojave or later requires user consent for applications to access privacy sensitive data. Hence you need to grant full disk access permission to IDrive and IDriveDaemon, in order to backup privacy sensitive data.
To pre authorize IDrive.app and IDriveDaemon.app,
Choose 'System Preferences' from the Apple menu.
Click 'Security & Privacy'.
Select 'Full Disk Access' under 'Privacy' pane.
Click and provide system authentication to allow changes.
Click .
Navigate to 'Macintosh HD > Applications > IDrive.app' to add 'IDrive' under Full Disk Access.
To pre authorize the IDriveDaemon.app, click .
Navigate to 'Macintosh HD > Library > Application Support > IDriveforMac > IDriveHelperTools > IDriveDaemon.app' and add 'IDriveDaemon' under Full Disk Access.
Re-install the IDrive application or restart your computer for changes to reflect.
Note:
Privacy sensitive data on Mac OS Mojave or later includes:
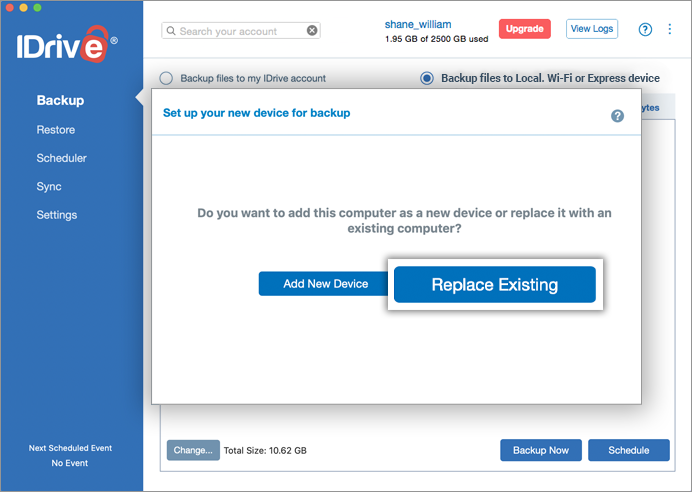
When I sign in to my IDrive account for the first time on a computer, why is it asking me to replace existing or add new device for backup?
On signing in to your account, IDrive allows you to either add the computer as a new device or transfer the backup set, scheduled jobs, and IDrive application settings etc from an already backed up computer to the new computer.
Transferring the backup set, application settings helps you to avoid time consuming initial backup, in case you are:
Replacing an old computer
Replacing computer's hard drive
Recovering after an OS reinstall
Note: Online / local backup set and scheduled jobs for online and local data will be transferred.
To replace an existing computer,
Download and install IDrive on your computer.
Sign in to IDrive using your credentials.
When the 'Set up your new device for backup' screen appears, click 'Replace Existing'.
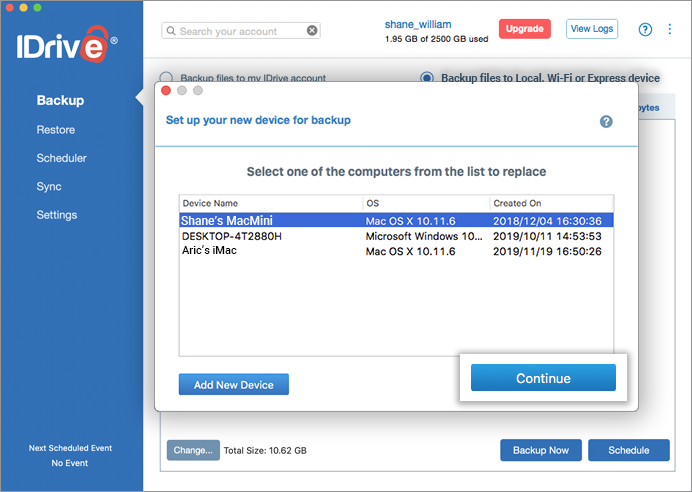
Select the desired computer from the 'Select one of the computers from the list to replace' screen and click 'Continue'.
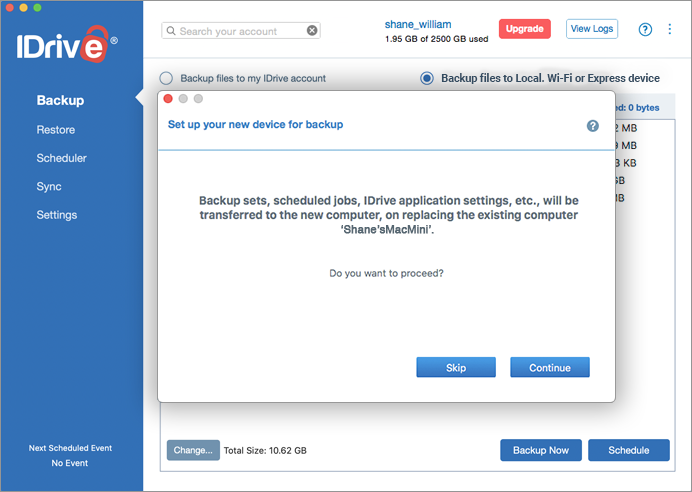
Click 'Continue' in the confirmation screen.
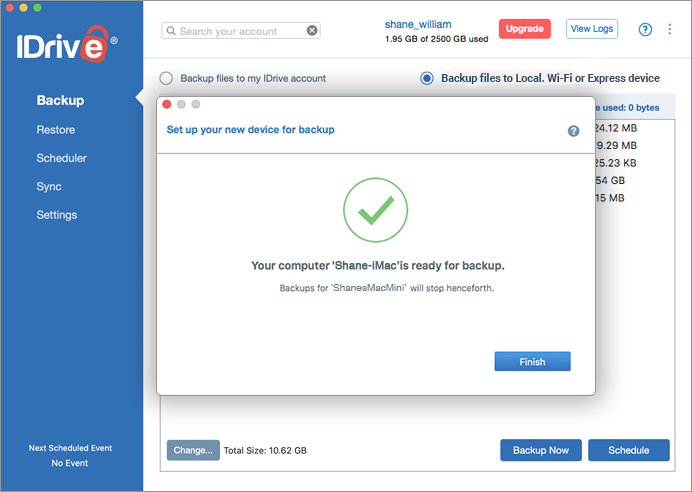
A message appears when the existing computer is replaced successfully. Backups will stop for the existing computer.
To add the computer as a new device, you can click 'Add New Device' in the 'Set up your new device for backup' screen.
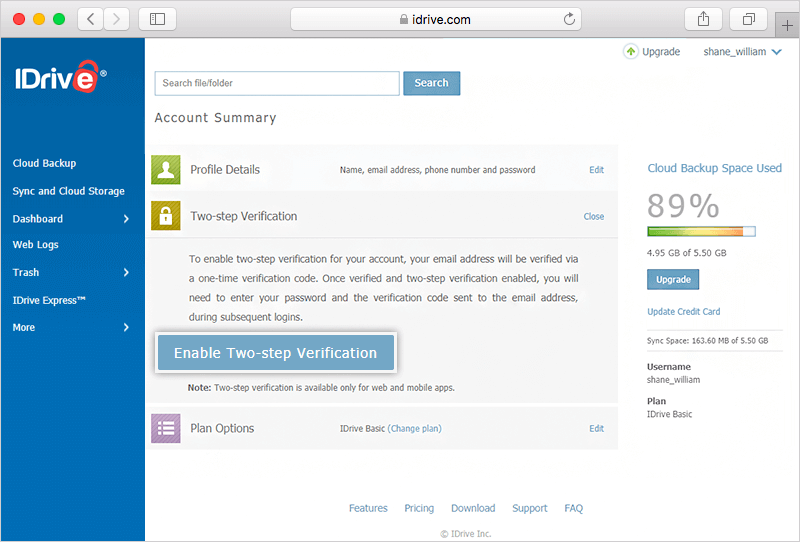
How do I set up two-step verification for my IDrive account?
The two-step verification provides additional security to your account and helps in preventing unauthorized access. Once two-step verification is enabled, in addition to your password, you will need to enter a verification code sent to your email address, while signing in to your IDrive account. You can enable two-step verification for your account via the web.
To enable two-step verification,
Sign in to IDrive via web browser and click your username at the top-right of the screen.
Select 'Account' and click 'Two-step Verification'.
Click 'Enable Two-step Verification'.
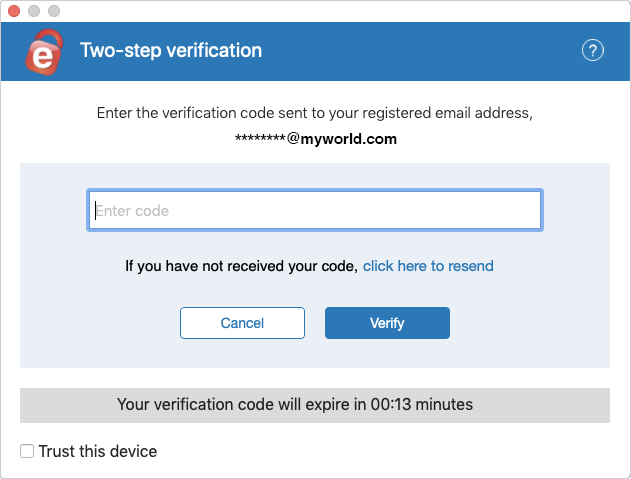
Enter the verification code sent to your registered email address and click 'Verify & Enable'. A message is displayed to indicate two-step verification is successfully enabled.
To sign in after two-step verification is enabled,
On the IDrive application sign in screen, enter your username and password and click 'Sign in'.
You will be prompted to enter a verification code sent to your registered email address. The code can be used only once and will expire after 5 minutes. Note: If the code expires or you do not receive the email, you can click 'Resend Now'. Contact support@idrive.com if any problem persists in receiving the email.
Enter the code and click 'Verify'.
Note: On selecting the checkbox 'Trust this device', the computer will be added as a trusted device and the user will not be prompted to verify with the code during subsequent sign in from this computer.
1. From the 'Backup' tab, click 'Change…' and select the files / folders.
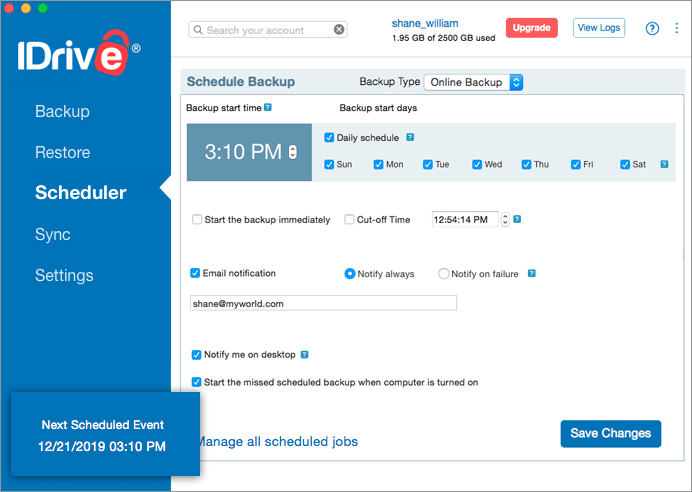
2. Click the 'Scheduler' tab and set the day, time and frequency for backup.
You can opt to receive email / desktop notifications on completion of the backup operation.
Can I schedule full and incremental backup on specific days?
IDrive does not have the conventional concept of full and
incremental backups (where modified data is stored separately from full backup). Every backup is basically a full backup with an
incremental effect.
IDrive overwrites the full backup with the modifications made to it during backup. In other words, you have full backup results each time. This helps in fast restores when needed.
IDrive uses advanced patching technology to determine the changed data at source and apply only the modified blocks on to the data at IDrive. No efficiency is lost due to IDrive methodology of updating full backups directly every time.
Is it possible to receive email notifications on the status of my backup jobs?
Yes. Sign in to IDrive desktop application and select the 'Email notification' check box under 'Scheduler' tab, you will receive emails on the status of your scheduled backup job.
I am not receiving an email notification for my scheduled backup(s). Why?
Ensure that you have enabled the notification option from the 'Scheduler' tab, provided a valid email address and selected the 'Email notification' option.
It is possible that email notifications from IDrive might mistakenly be getting filtered out as Spam and reaching your Spam or Bulk mail folder.
For a confirmation on the backup jobs, you can also view the logs.
How can I perform an immediate backup without signing in to the application?
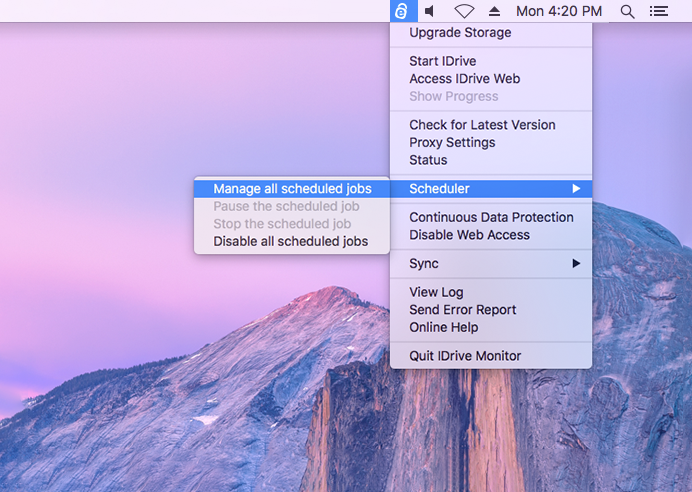
Click the IDrive status item on the system menu bar and select 'Scheduler' > 'Manage all scheduled jobs'. In the 'Manage all Scheduled Jobs' screen, select the 'Start the backup immediately' check box. This will immediately execute backups for the backup set, provided you have created one and signed in to the application at least once before.
I am backing up an external network drive to my IDrive account. If I use a new Mac machine with the same external network drive attached to it, will it impact the backups?
By default, IDrive creates a unique root folder with the Mac name to backup data, which mirrors the complete data structure hierarchy of your Mac. So your files from external drives will be backed up to the connected Mac name folder.
If you now connect your external drive to the new Mac machine and perform the backup, your backups will be impacted, as data from the external drive will be backed up to the new Mac name folder created under your account.
However, in case the Mac machine names are same on both the old and new systems, your backups will not be impacted.
Will my backups take place even when my Mac is in the sleep mode?
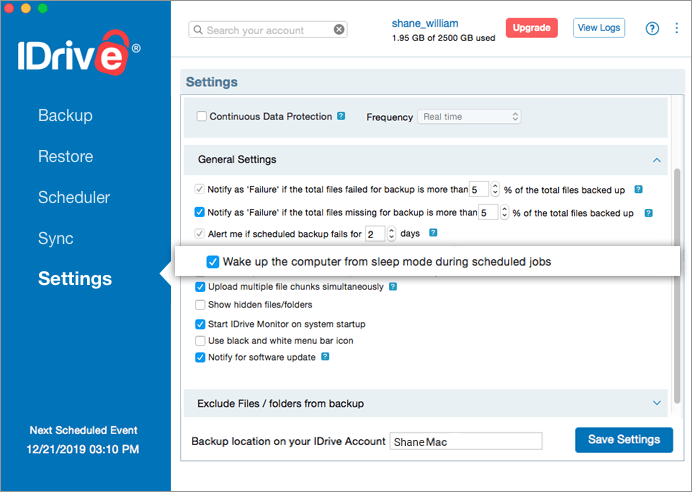
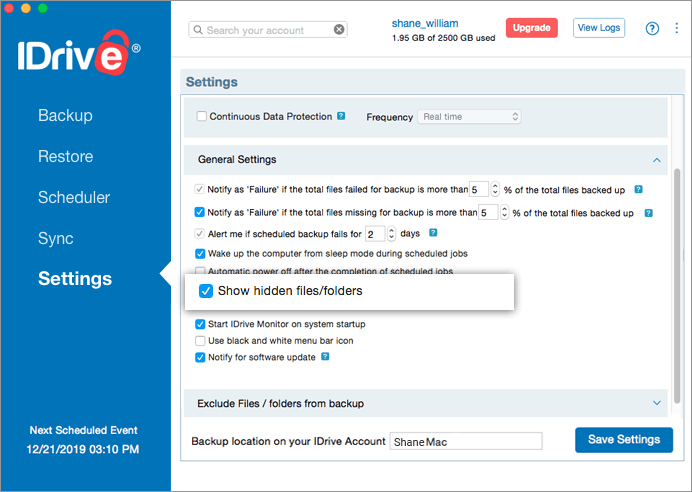
Yes, your scheduled backups will take place even in the sleep mode if you select the 'Wake up computer from sleep mode during scheduled job' checkbox from the 'Settings' tab.
Will a missed scheduled backup take place when the computer is restarted after the scheduled time?
Yes. The scheduled backup will commence as soon as you restart the computer even if it is after the scheduled time. However, this is applicable only if you have selected the 'Start the missed scheduled backup when the computer is turned on' option from the 'Scheduler' tab.
In case you have not selected the option, then the scheduled backup will commence only if you restart the computer within 30 minutes of the scheduled time.
If you restart the computer after 30 minutes of the scheduled time, the scheduled backup will commence at the next frequency (as per the date and time that was set earlier).
Can I automatically stop the scheduled backup in IDrive if my laptop battery is running low?
Yes, you can choose to stop your ongoing scheduled backup whenever your laptop battery drops below a predefined value. To enable this option, simply go to the 'Settings', select the corresponding checkbox, and set the battery percentage anything between 20 through 50.
The status of your scheduled backups can be viewed using the IDrive status item on the system menu bar.
Click 'View Logs' button on the top-right corner of the IDrive window and select 'Backup' folder to see the log files of the recent sessions.
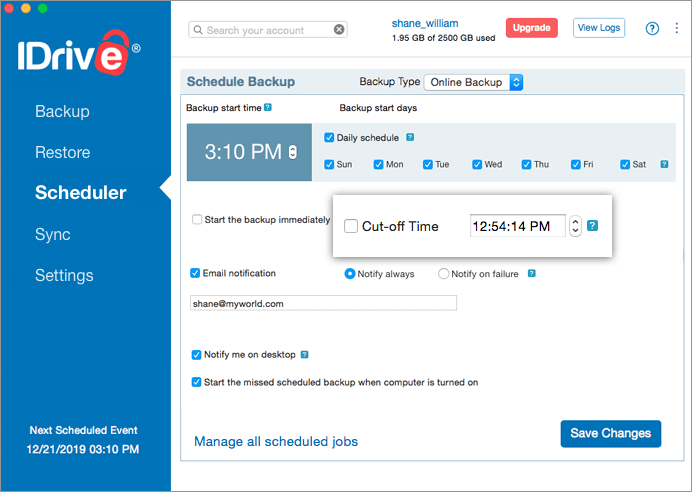
Yes. Using the 'Scheduler' > 'Cut-off Time' option, you can stop the scheduled backup at the specific time. The backup is resumed at the next scheduled time from the point it was stopped.
IDrive lets you exclude files/folders in your computer from being backed up by using the 'Exclude' feature.
From the 'Settings' tab, under the 'Excluded Files / folders from backup' section, you can exclude files/folders with full/partial path names.
Files/folders with full path names:
To exclude files/folders with full name,
Under 'Excluded Files / folders from backup' section, right-click and select ‘Add’ or click .
Select the files/folders to add and click ‘Open’.
Files/folders with partial names: You can exclude files/folders based on their partial names, file formats, etc.
To exclude files/folders with partial name,
Under the ‘Excluded Files / folders from backup’ section, select the ‘Files/Folders with partial names’ option.
Right-click and select ‘Add’ or click .
Enter the partial name, along with wildcard characters (*,?).
Alternatively, you can exclude files/folders from the main application screen.
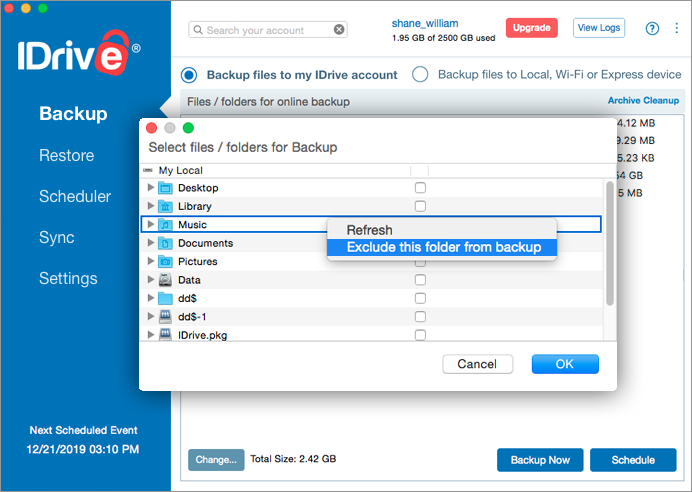
To exclude files/folders from the ‘Backup’ tab,
Click 'Change…' from the 'Backup' tab.
Right-click on any file / folder, and click 'Exclude this file/folder from backup'.
Note:
The excluded folders are marked in Orange color on the 'My Local' pane.
To backup an item which is on the exclude list, right-click the corresponding list box and select 'Remove' from the sub-menu. Alternatively, select the item and click .
Files and folders excluded by default by the application cannot be removed from the list.
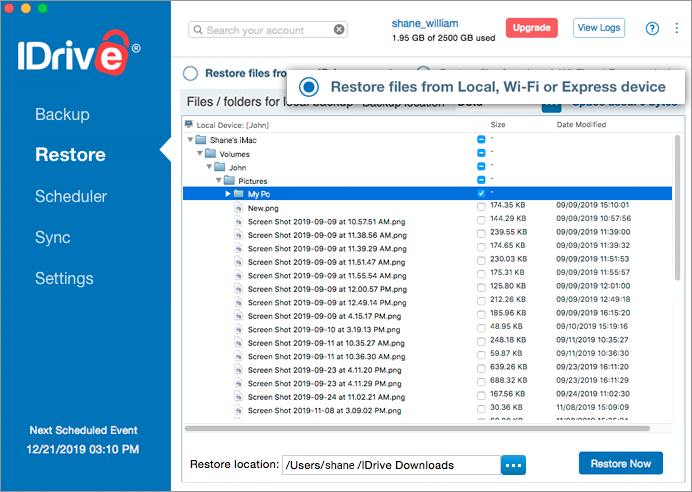
How do I restore files / folders from my IDrive account to the local machine?
Select the files / folders that you need to restore from 'Restore' tab and click the 'Restore Now' button. The chosen files are saved to 'IDrive Downloads' folder.
Note:
Files / folders restored are overwritten (if they already exist).
If you wish to restore files to a different location change the 'Restore Location' path before restoring files.
One of the two IDrive accounts I hold has expired. I had scheduled backup job from both the accounts. I want to delete the same from the account that has expired while retaining the jobs for the other account. Is this possible?
Yes, you can delete the scheduled backup/restore jobs using the 'Manage all the Scheduled Jobs' feature in IDrive.
Click the IDrive status item on the system menu bar and select 'Scheduler' > 'Manage all scheduled jobs'. In the 'Manage all Scheduled Jobs' screen, right-click on the scheduled backup from the list and click 'Delete'. You will be prompted to confirm the deletion, click the 'Yes' button.
When I am signing in to my IDrive account for the first time on a new computer, it is asking me to select location/computer for backup. Why?
IDrive allows you to restore your previous computer's backup archive on your new computer. You can select the 'Adopt / Link to an existing location / computer' option, after signing in reconnect to the previous computer's backup archive in case you are replacing an old computer, replacing the computer's hard drive or recovering after an OS reinstall. By adopting the previous computer's backup archive, you can avoid time consuming initial backup of your files.
To adopt your backup archive,
Download and install IDrive on your computer.
Sign in to IDrive using your credentials.
Click on 'Adopt / Link to an existing location / computer' when prompted to select location/computer for backup. A list of locations/computers linked to your account appears.
Select the desired computer/location from the list and click on 'Adopt / Link Selected Location' to restore your previous backups.
In case you do not wish to adopt your previous backups on the new machine, you can click 'Proceed to create new location with this computer name' when prompted to select location/computer for backup.
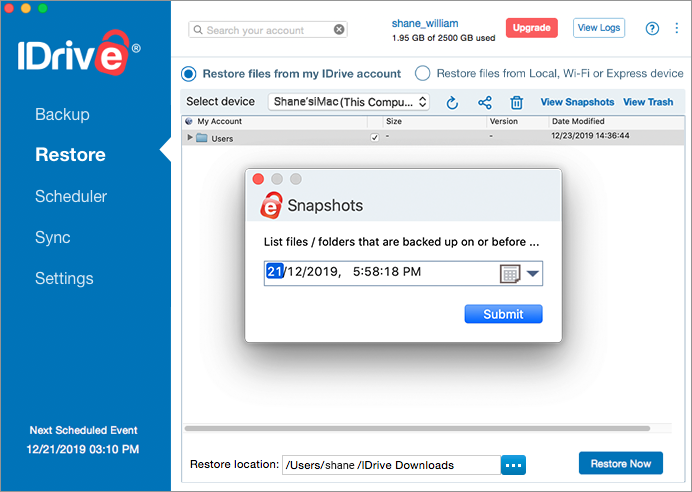
I can see a 'View Snapshots' button on the Restore tab menu. What is it?
Certain accounts may see the feature 'View Snapshots' in the application. Snapshots are a historical view of your data, stored in your IDrive account, which allow you to perform point-in-time recovery. They are useful in case your files are corrupted by malware and you want to restore a previous version of the files.
To perform snapshot based restore,
Go to the 'Restore' tab and click 'View Snapshots'.
Select the date and time and click 'Submit'. A list of all the data backed up on or before the selected date appears.
Select the required files/folders and click 'Restore Now'.
Do I need to backup Time Machine data folder to my IDrive account?
If you have selected all required files / folders that needs to be backed up from your Mac then there is no need to backup Time Machine data again as it will duplicate the backup data on your IDrive account. To avoid this duplicate copy, by default IDrive will exclude Time Machine data ('Backups.backupdb') folder from your backup.
If you want to include Time Machine folder in your backup set,
Go to the 'Settings' tab.
Under 'Exclude Files / folders from backup' section, select the 'Files/Folders with partial names' option.
Uncheck 'Backups.backupdb' folder to remove it from the excluded files and folders list.
Click 'Save Settings'.
Go to 'Backup' tab and add the Time Machine folder to the backup set.
Note: Backing up Time Machine data with IDrive does not work very well, because Time Machine will not recognize the backed up data for recovery at a later point of time. Additionally, if Time Machine data is included in your IDrive backup, your archive can grow to many times the size of the actual files being backed up, resulting in unnecessary multiple copies of the same file.
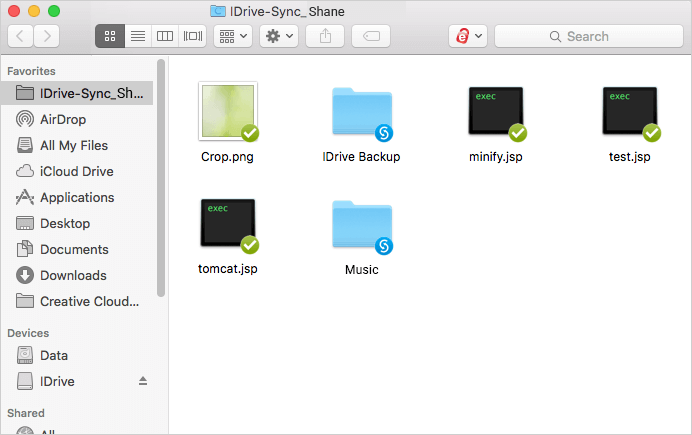
IDrive links all of your devices such that whenever a file is updated, it is instantly available on all linked devices. For syncing files, IDrive creates a unique folder on every linked computer and provides separate cloud storage. You can sync files using the Sync folder on linked desktops, or directly via IDrive.com and mobile apps.
How do I know where my Sync folder is located? Can I change its default location?
Sign in to the IDrive desktop app and click the 'Sync' tab. You can find your IDrive Sync folder's location under 'My Sync folder'. Click 'Move' to move the contents of your Sync folder to a new location.
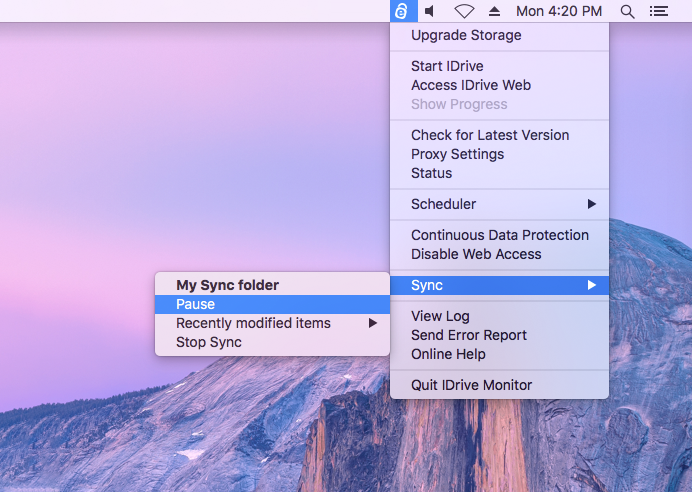
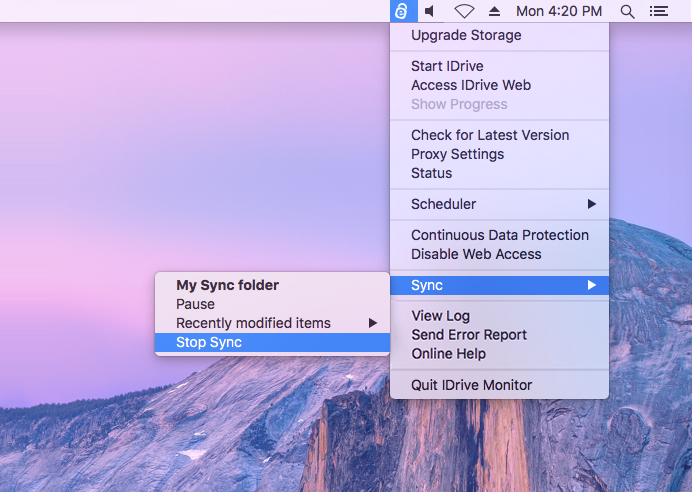
Alternatively, you can also click the IDrive status item on the menu bar and select 'Sync' > 'My Sync folder'.
Sign in to your IDrive account with your username and password.
Mouse hover the IDrive status item on the menu bar. A tooltip appears displaying the number of files to be synced, the percentage completed, and the speed of the transfer.
Alternatively, you can also right-click IDrive status item 'Status' to see the sync status within the menu. When syncing is complete, a brief notification is displayed on your screen.
Note: The first line in the tooltip displays the IDrive files status followed by the status of the Sync in progress.
Your IDrive Sync folder's storage space is the same as the IDrive plan that you choose. The size is independent of the IDrive account storage. Hence, as long as there is enough space in your IDrive Sync folder, you can continue syncing data to it, even if your IDrive account space gets used up.
Selective Sync is a feature that allows you to select only the folders you want to sync to your Mac. It gives you the control to ensure that you have only the files you need on a particular computer. It is helpful if you want to save space on your computers with limited hard disk space.
How do I select the folders that I do not want to sync to my computer?
By default all the folders will be selected for sync. If you wish to avoid syncing particular folders,
Sign in to your IDrive application and on the navigation pane, select the 'Sync' tab.
Click 'Selective Sync'. A window appears with the list of all the folders in your Sync storage.
Clear the checkbox of the folders that you do not want to sync and click 'Save'. Accordingly, the folders will be removed from the Sync folder on your Mac.
Will my files still sync if my computer is turned off?
IDrive will not be able to sync or access your data from computers or other devices unless they are turned on and connected to the Internet. If a computer is turned off when a file is updated from another device, IDrive will update that file, once the computer is on and connected to the Internet.
What happens when I run out of space in my Sync folder?
Upgrade your IDrive account to a higher plan once you run out of space in your IDrive Sync folder. In order to make room for new files, you may even remove the old data that you no longer need.
Can I use IDrive's sync feature to synchronize my Outlook data files, QuickBooks files, project development software like Xcode or audio software like Ableton Live?
Currently, IDrive cannot sync Outlook, QuickBooks, Xcode, Ableton Live, any other project development software or audio software files as these files are continuously being accessed, when the applications are open. However, you can include these files in the backup set of the desktop application and then back them up to your account.
IDrive retains previous versions of all files backed up to your account. Currently you can restore 30 previous file versions, and for accounts created prior to 11-07-2018 you can restore up to 10 versions, to any location on your local computer.
Does versioning (previous versions of files) impact the available quota (storage space in my account)?
Your available quota depends on the storage requirements of the most recent view of your data. Backup of older versions do require additional space, however, this is not charged to your usage. In other words versioning does not increase your storage requirement.
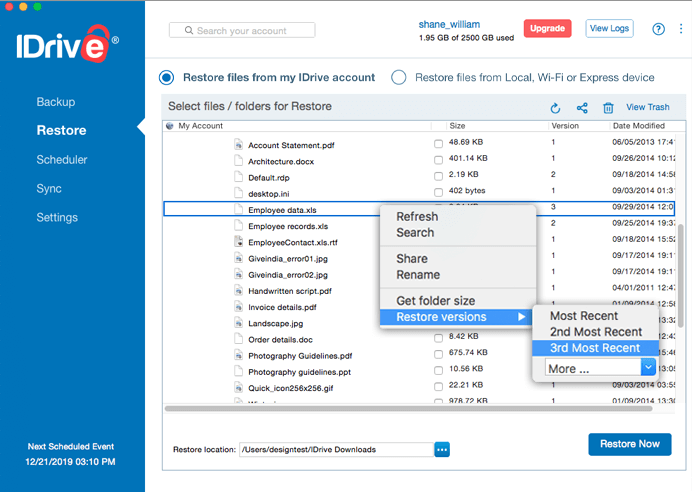
Does IDrive support folder-wise restore of files with earlier versions? *
Yes, to restore a folder with earlier versions of files, you can right click on the required folder and hover on 'Restore Versions' any of the following options:
Most Recent - Use this option to restore the latest versions of files in the folder.
Example: If a folder has 5 files, all the 5 files will be restored in its latest versions available.
2nd Most Recent - Use this option to restore files prior to the last backed up version.
Example: If a file in the folder has 3 different versions, this feature will restore only the version prior to the last backed up, i.e., file version 2.
3rd Most Recent - Use this option to restore the third last version of a file in a folder.
Example: If a file in the folder has 3 different versions, this feature will only restore file version 1.
More - Provides an option to restore from fourth to tenth most recent version of files in a folder.
* Note: For some accounts, certain functions like folder-level versioning, version restore from Trash, Continuous Data Protection for network and external drives, adopting backup archive and settings from a device, and Snapshots are not available.
 . For accounts with a large number of files the process may take a while.
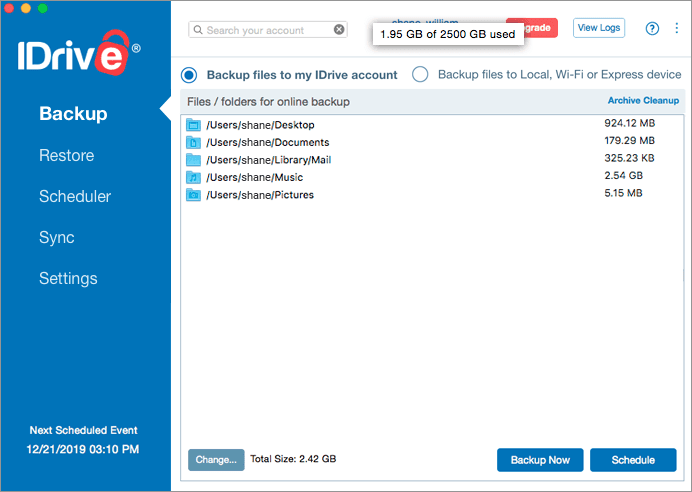

 under the 'Restore' tab. You will be redirected to your web account, from where you can set the share parameters.
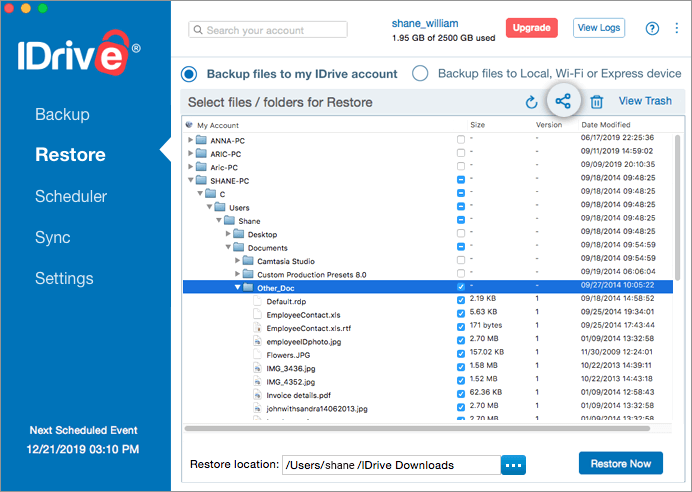
 .
.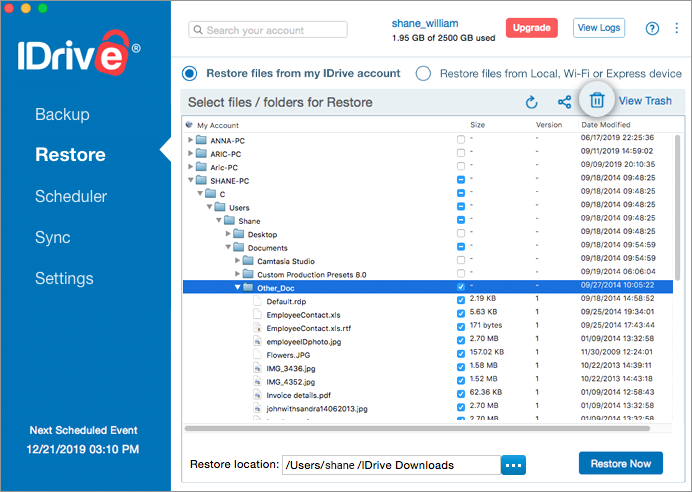
 to move the files to the original location in your IDrive account. Or click 'Restore Now' to restore your files to the desired location in your local computer.
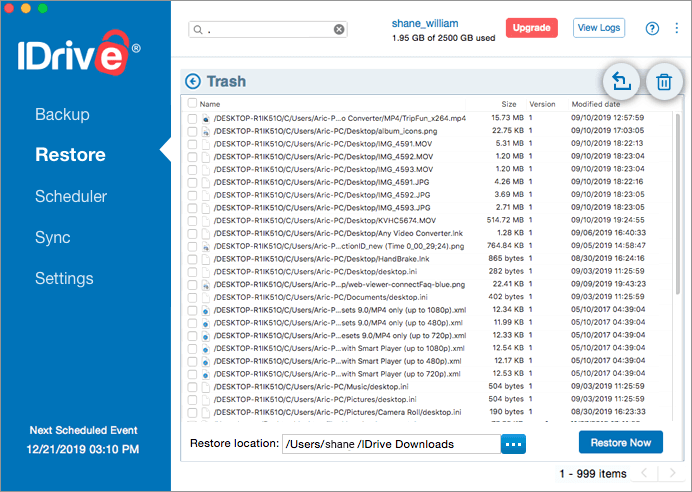

 and provide system authentication to allow changes.
 .
.